Requesting payments
Requesting payments may be straightforward for casual users. All they need to do is share an address and an amount, and wait for the payment to appear in their wallet. For businesses that receive hundreds of payments, it is important to have options to more easily manage and organize transactions.
User A shares their address, the amount, and an optional payment ID with User B. User B initiates the transaction with their own wallet. The transaction is queued and processed by the network. After a certain amount of blocks, the transaction is considered confirmed.
Request
Sending
Processing
Confirmation
This page focuses on Step 1, for the other steps, review the page about sending.
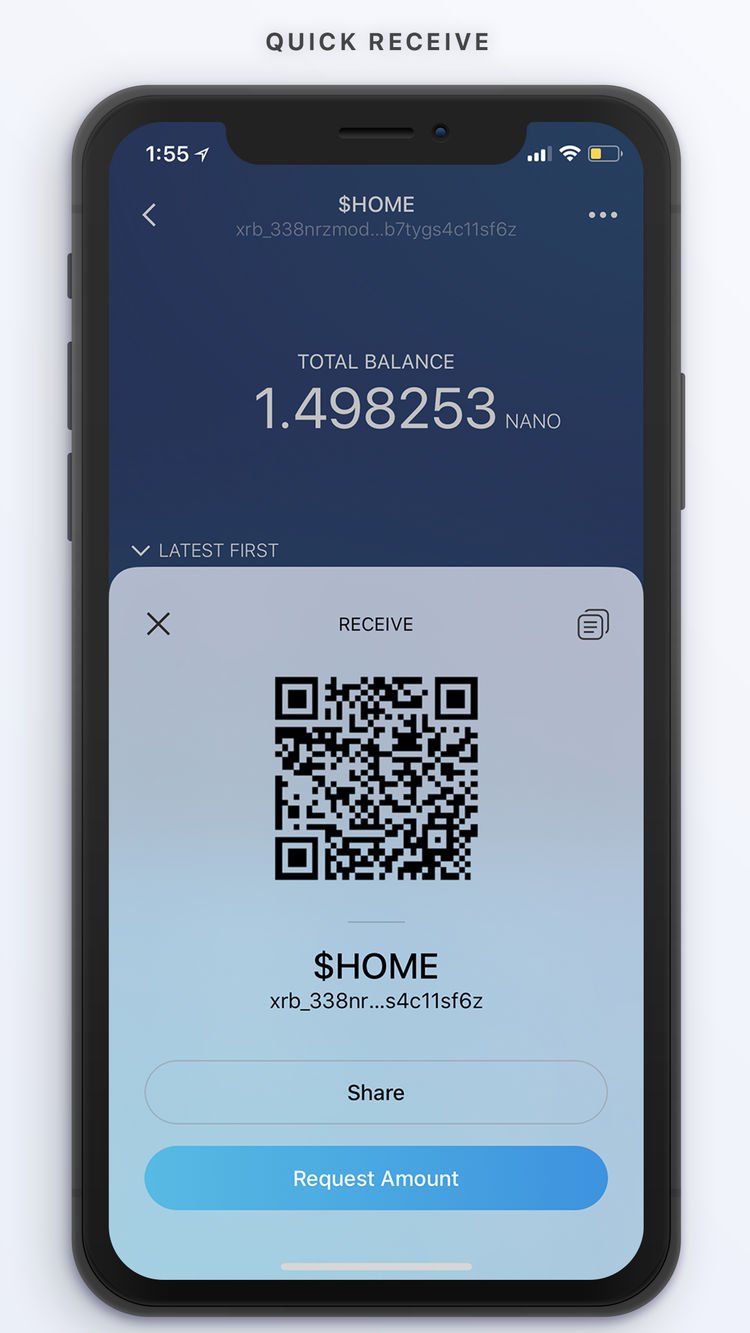
Most wallets have a screen for receiving or requesting payments. Typically, this is just a way to view your public address and a matching QR code, so it can be shared with others so they can pay you. The Obike app shown here is the most basic example of this.


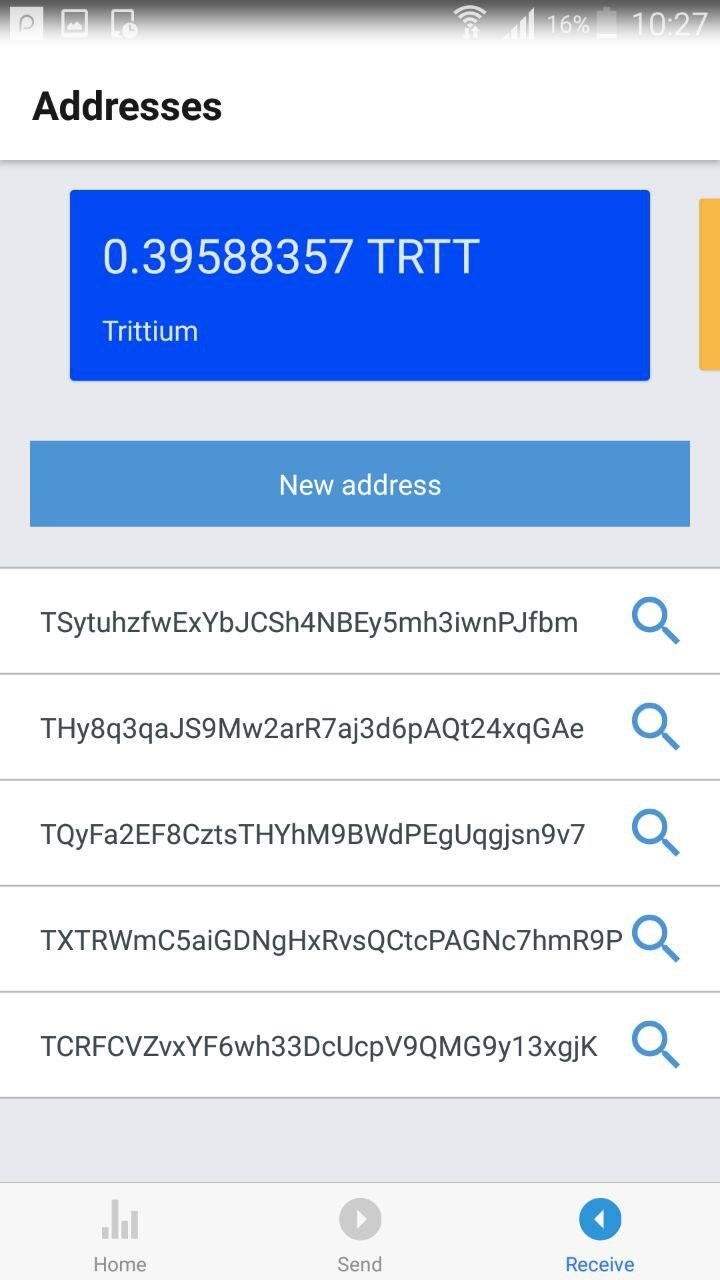


Multiple addresses
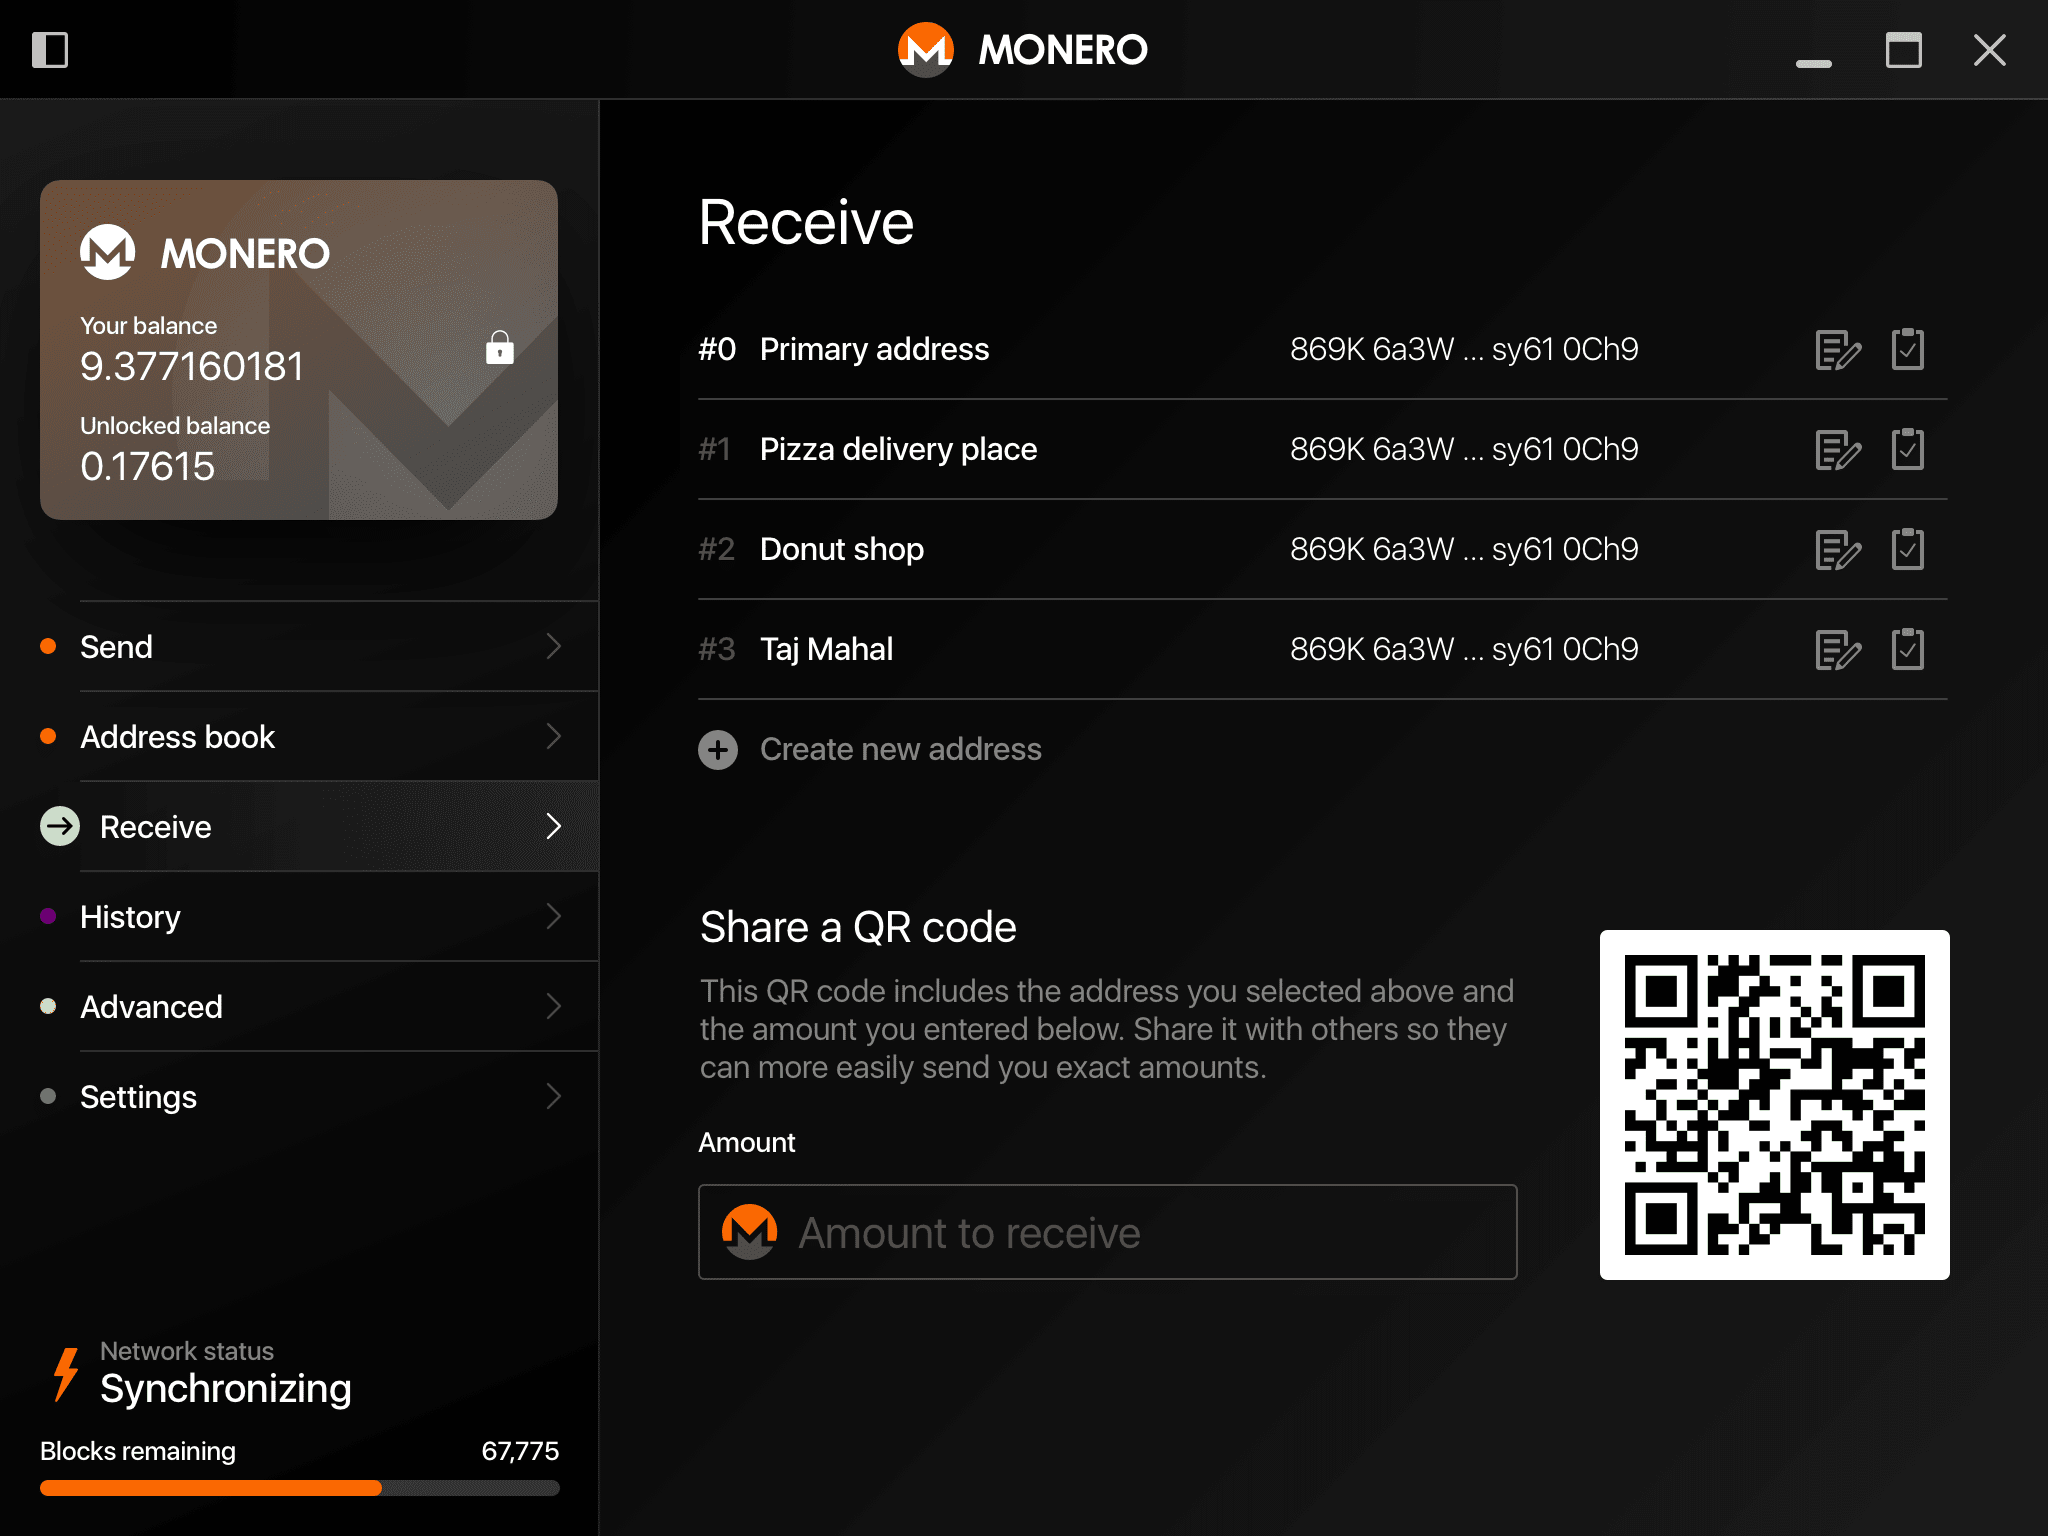
The Monero desktop wallet allows for managing multiple addresses. Each address can be labelled to make them easier for users to identify. However, the labels are only stored locally (and not in the blockchain). That means the labels are not available on a wallet on another device, which is a small usability problem.
If an amount is entered into the input field at the bottom, that amount is also encoded in the QR code. This makes it easier to request specific amounts of Monero by others. A payment ID still needs to be communicated separately.